

digitalsignage.Net Core Edition allows you to schedule individual media file content (scenes) within a single playlist in Playlists.
Setting a single scene to play on certain dates or within a time period, can easily be achieved by setting a schedule on the scene itself within the Playlist.
Scheduling also allows whole Playlists themselves to be scheduled in Channels. Scheduling can be done weeks, months or even years in advance making organizing your scheduling easier and more convenient.
Scheduling a whole Playlist at the Channel level allows the user an extra level of scheduling. For example….. you may have two Playlists, Playlist A and Playlist B. Playlist A only runs on a Monday 9am-5pm, but Playlist B only runs at weekends. The flexibility of scheduling give users a wide range of dayparting options.
Playlist scheduling
There are a few different options, so lets go over Scheduling a Playlist scene….
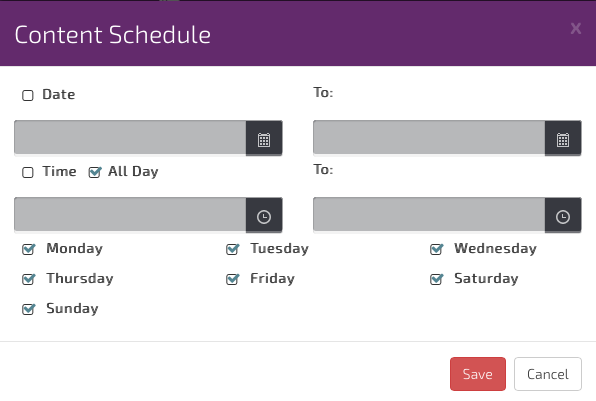
If you want the scene to only play between certain dates, tick the Date checkbox and set the ‘From’ and ‘To’ dates. Clicking the calendar icon will open a calendar to allow you to choose a date. The scene will only play between the set dates.
If you want the scene to only play between certain times, tick the Time checkbox and set the ‘From’ and ‘To’ times. The scene will only play between the set times. Clicking the clock icon will open a drop down menu from which you can choose a suitable time.
Note: If you need the scene to play all day simply tick the All Day checkbox.
If you need a scene to play between certain dates and times, simply set both the Date and Time elements in the schedule options.
For a scene that only needs to play on Mondays un-tick all the other days of the week. Using the scheduling elements either alone or in combination provides great flexibility when scheduling a scene. Next we’ll go through an example.
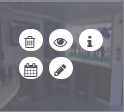
In this example we’ll schedule the scene WhatGoesWhere.jpg to only play during the following dates and times:
Dates: 7th November 2018 – 11th November 2018
Times: 12:30-13:30
Days of the week: Mondays and Wednesdays only
To set up this schedule firstly click Playlist in the menu and then click the playlist which contains the scene you need to schedule.
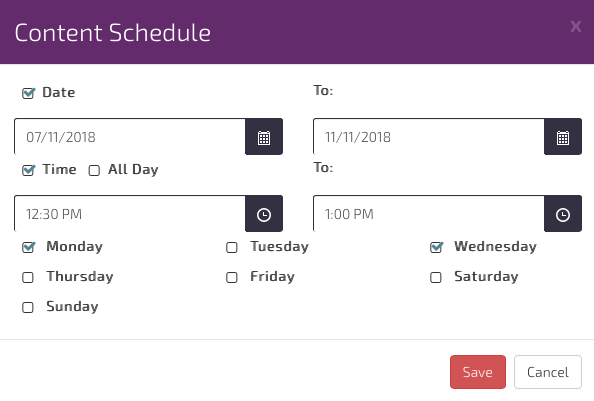
Now hover the mouse over the scene to show the options and click the Schedule icon.
Scene options

Schedule- icon
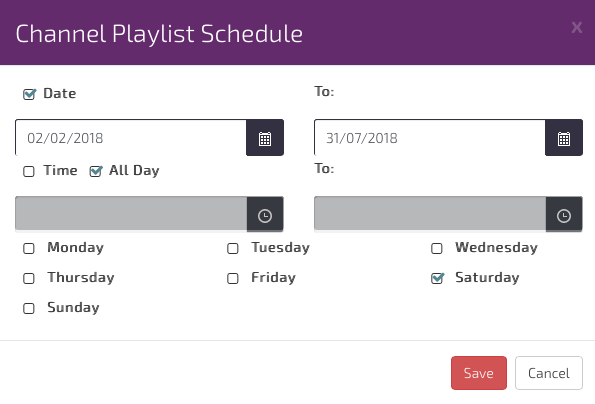
As shown in the picture below we set the correct Dates, Times and Valid Days as previously explained and click Save.
The scene will now has a red icon to show that the scene has a schedule set against it.
Once you are done click the flashing Publish button to publish your changes
Channel Scheduling
We’ll now look at Scheduling at the Channel level.
Scheduling at the Channel level is done the same way as Playlists, however the schedule is set on the Playlist itself rather than on the individual playlist scene.
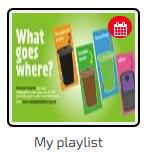
Click Channels in the menu and then click the Channel, i.e. Channel 1, which contains the playlist you want to schedule, in this example called ‘My Playlist’

Now hover the mouse over the Playlist and click the schedule icon.
Channel options
Schedule-icon
Set the schedule you require and Save.
Again the scene will show a red schedule icon to show that the Playlist has a schedule set against it.
Once you are done click the flashing Publish button to publish your changes
Any questions?
Email our Support Team at support@digitalsignage.net